
How to Make an Otoconia Fountain
Watch otoconia fall in an infinite loop with your very own otoconia water fountain! The fluid dynamics of the semi-circular canals are visualized as the otoconia are cycled through the fountain.
Special thanks to researcher Leif Walther who studied in detail the inner ear crystals, also known as otoconia/otolith. His research article titled The Inner Structure of Human Otoconia shows in detail multiple cross-sections of otoconia which were used as reference images to make the base model.
Step 1
Find 3D printer or 3D printer service
At full size you will need a medium sized 3D printer. We used the Prusa MK4 for the one shown. If you aren’t able to find one, check out a service like Craftcloud. Use referral code REFN8KMEEQL to get 10% off your order! Our models are provided in millimeters and we recommend any basic plastic like PLA or SLA for a cost effective printing.
Step 2
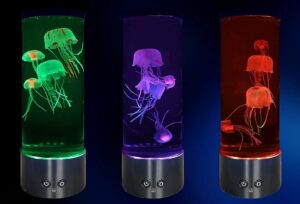
PURCHASE FOUNTAIN
We tested several fountains purchased online and this one was the most reliable and the perfect size for your office: https://amzn.to/3QqIkwz
Step 3
Download the model
We have published our models on a 3D design site called Printables which allows people to collaborate and connect on projects. Please visit the Vestibular First 3D Models page to view this and our other 3D models.
Step 4
Print the models
There are two components to print with different settings. Each printer and filament is different, however, here are our general recommendations. Your mileage may vary–so use these settings as just a starting point:
Tube
- Layer Height: 0.30mm
- Seam Position: Rear
- Infill: 100%
- Supports: On Build Plate Only
Otoconia
- Layer Height: 0.20mm
- Perimeter Layers: 3
- Top Layers: 3
- Bottom Layers: 4
- Seam Position: Rear
- Infill: In our testing of several off-the-shelf filaments, most were within 50-60% depending on the filament density. Testing should be done to get the perfect fall rate. If they float, increase the infill density in 1% increments. The reverse is true if they fall too quickly. Print 2-3 otoconia at a time to get this perfect before you print the recommended 25.
- Supports: On Build Plate Only
- Raft Layers: 2
Step 5
Clean and Assemble Parts
- Using a heat gun, make sure all stringing is smoothed on the otoconia. Tossing them in a metal bowl while using a heat gun works well, although can be kinda noisy!
- Make sure there are no sharp edges or loose overhangs on the otoconia. This will cause them to get stuck in the fountain.
- Remove supports from bottom of tube and smooth all edges to make sure otoconia will not get stuck.
- Insert tube into the aquarium, fill with water, then insert otoconia.
- Once running, knock off any air bubbles from the otoconia to get the perfect fall rate.
- Enjoy!